Roo-Code, previously known as Roo Cline, represents a significant advancement in developer tooling, functioning as an AI-powered autonomous coding agent seamlessly integrated within the Visual Studio Code environment. Its fundamental purpose is to elevate the coding experience through the incorporation of AI-driven automation, support for multiple language models, and a range of experimental features designed to enhance productivity.
At its core, Roo-Code boasts a wide array of capabilities designed to assist developers throughout the software development lifecycle. It can understand and respond to instructions provided in natural language. It possesses the ability to directly interact with files within the project workspace, enabling it to read and write code and other project-related documents. Moreover, Roo-Code can execute commands within the terminal of the code editor, facilitating tasks such as building projects and running tests. Its functionality extends to automating actions within web browsers, offering possibilities for testing and interaction with web applications. A key aspect of its versatility lies in its ability to integrate with various artificial intelligence models, supporting openAI compatible model providers like regolo.ai/.
Additionally, Roo-Code allows for the creation of customizable personalities and capabilities through its Custom Modes feature, enabling it to adapt to a wide range of development roles and tasks. The sheer breadth of these core functionalities indicates that Roo-Code is designed to be a versatile tool addressing numerous facets of the development process, moving beyond the scope of simple code completion or suggestion tools and positioning itself as a more holistic AI assistant.
Installing Roo-Code
To begin utilizing the capabilities of Roo-Code within VSCode, a straightforward installation process is required.
The recommended installation method for most users, especially those using standard VSCode, is through the VS Code Marketplace. To install, first open Visual Studio Code. Next, navigate to the Extensions view, which can typically be accessed by clicking on the Extensions icon in the Activity Bar on the left side of the window or by using the keyboard shortcut Ctrl+Shift+X (on Windows and Linux) or Cmd+Shift+X (on macOS).
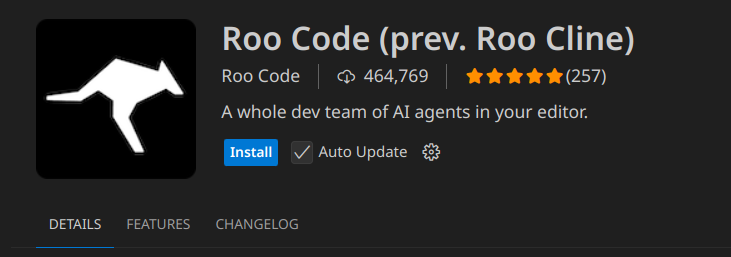
In the search bar at the top of the Extensions view, type “Roo Code“. From the search results, locate the entry for “Roo Code” and click the Install button. Once the installation is complete, you will likely be prompted to reload VS Code; click Reload to finalize the process. After reloading, you should find the Roo Code icon in the Activity Bar, which you can click to open the Roo Code panel.
For users of VS Code-compatible editors such as VSCodium, an equivalent installation method is available through the Open VSX Registry.
If you cannot access to a Marketplace, it is possible to install Roo-Code from a VSIX file. To do this, first download the .vsix file from the latest release available on the Roo Code GitHub Releases page. Then, open VS Code, navigate to the Extensions view, click on the “…” menu at the top right of the Extensions view, and select “Install from VSIX…”. A file dialog will appear; browse to the location where you downloaded the .vsix file, select it, and click Open. VS Code will then install the extension.
Once Roo-Code is successfully installed, the next crucial step is the initial configuration, which involves connecting your preferred AI provider.
Connecting Roo-Code to regolo.ai/
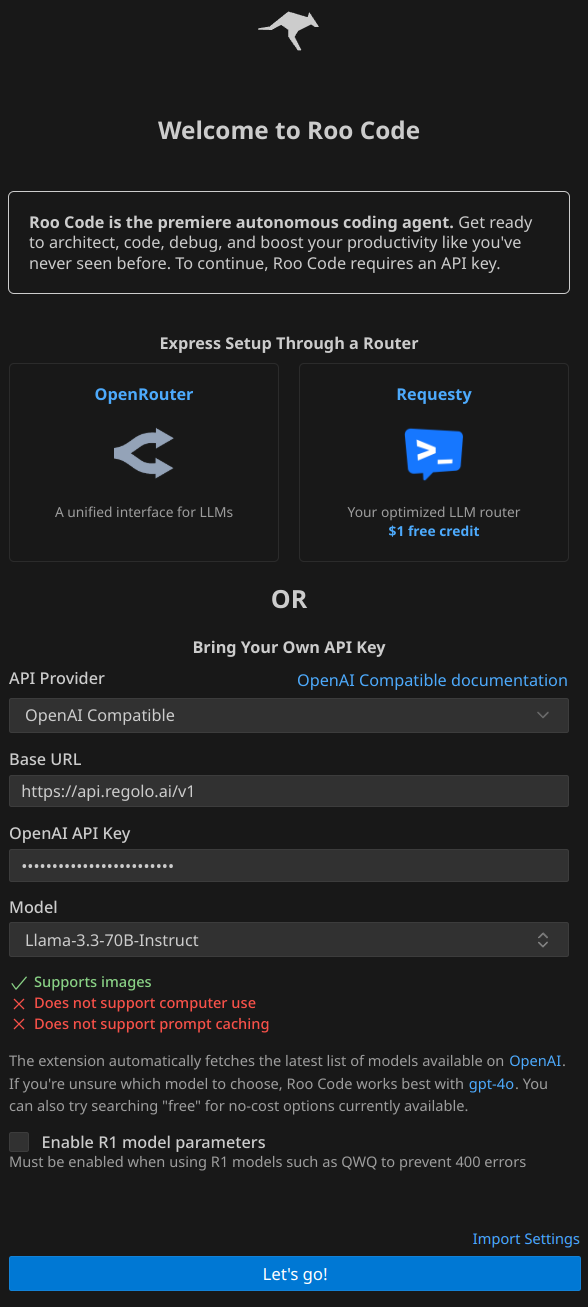
The first time you open Roo-Code by clicking on its icon, you will be prompted to add your AI model provider. As you can see in the picture, all you have to do is selecting “openai compatible” as the API provider, then selecting the base URL of regolo.ai/ “https://api.regolo.ai/v1” and choosing the model you want to use.
After completing the model setup, you can finally start using Roo-Code to simplify your coding workflow through its capabilities. If you still haven’t decided whether you actually need the power of Roo-Code in your programming style, here are some of its features to help you understand thhe situations in which it shows its full potential.
Key Features and Functionalities of Roo-Code
Roo-Code distinguishes itself through a comprehensive suite of features designed to empower developers with AI assistance at various stages of the coding process.
At the heart of its interaction model is the ability to communicate with AI agents using natural language. This allows developers to describe their desired outcomes and tasks in a conversational manner, making the interaction with the AI intuitive and accessible.
Roo-Code possesses the capability to directly access and manipulate files within the user’s project workspace. This includes generating new code, modifying existing files, and performing other file-related operations as directed by the user’s natural language instructions. When changes are made to files, Roo-Code conveniently displays diffs, allowing developers to easily review the proposed modifications before accepting them. Moreover, the extension tracks all changes made to the codebase via the editor’s timeline, providing a mechanism for users to review or revert to previous states if necessary.
Here are some of its features.
Core AI-Powered Coding Capabilities:
- Natural Language Interaction and File Manipulation: Roo-Code allows you to instruct it using plain language to perform various coding tasks directly within your project. This includes reading and writing code in your files, with the ability to review changes before they are applied.
- Intelligent Task Automation: It can automate common development tasks by executing commands in the VS Code terminal, such as running builds or tests. Roo-Code can even monitor the output and react to errors. For trusted commands, you can enable auto-approval for a smoother workflow.
- Web Browser Automation for Testing: Roo-Code can interact with web applications by opening a browser, navigating to URLs, performing actions like clicking and typing, and even capturing screenshots and console logs for testing and debugging purposes.
- Versatile AI Model Integration: Roo-Code supports a wide range of AI models through OpenAI-compatible APIs and custom models. You can even configure different models for different tasks, allowing you to optimize for performance or cost. Recent updates include support for providers like Groq, Chutes, and LiteLLM, expanding your options.
Customization and Advanced Workflows:
- Customizable AI Personas (Modes): Roo-Code lets you create specialized AI assistants tailored to specific roles like QA engineer or architect. These “Custom Modes” can have unique instructions and access to specific tools. Built-in modes like Code, Architect, and Ask provide starting points for various tasks.
- Extensible Functionality via Model Context Protocol (MCP): MCP allows Roo-Code to connect with external tools and services, such as databases or APIs. This framework enables you to integrate Roo-Code into your existing workflows and even create your own custom development tools.
- Memory and Context Management: For maintaining project understanding over time, Roo-Code can be used with a Memory Bank to remember important details. You can also use context mentions (typing
@) to include specific files, terminal output, or other relevant information directly in your prompts. - Structured Task Management with Boomerang Tasks: This feature helps break down complex coding challenges into smaller, more manageable subtasks, allowing Roo-Code to handle intricate workflows more effectively.
Practical Usage and Safety:
- Mode-Based Workflow: Start with Architect Mode for planning, then switch to Code Mode for implementation. Debug Mode helps with problem-solving, and Ask Mode for research. Custom Modes can be used for specialized needs.
- Effective Prompting Techniques: Be specific in your requests, break down tasks, provide examples, and iterate on your prompts to guide Roo-Code towards the desired outcome.
- Automatic Checkpoints and Rollback: Roo-Code automatically saves checkpoints during various actions, allowing you to easily revert to previous states if needed, providing a safety net for autonomous operations.
Benefits of Integrating Roo-Code into Your Workflow
The integration of Roo-Code into a developer’s workflow offers a multitude of benefits aimed at enhancing productivity and streamlining the software development process.
One of the most significant advantages is the potential for increased efficiency. By automating repetitive coding tasks, Roo-Code frees up valuable developer time that can be better spent on more complex problem-solving and innovation. Its ability to quickly generate code from natural language descriptions further accelerates the development process, allowing for faster prototyping and feature implementation.
Roo-Code can also significantly reduce the amount of boilerplate code that developers typically have to write manually. By generating common code structures and patterns, it allows developers to focus on the unique logic and requirements of their applications.
By accelerating various stages of development, from initial code generation to debugging and documentation, Roo-Code can contribute to faster development cycles. This can be particularly beneficial in fast-paced environments where time-to-market is critical.
Roo-Code can also serve as a valuable tool for learning and exploration. Its ability to answer questions about the codebase can provide developers with insights and explanations that deepen their understanding. It can also facilitate the exploration of new technologies and coding approaches by quickly generating examples and allowing for rapid experimentation.
The high level of customization offered by Roo-Code through its Custom Modes allows developers to tailor the AI’s behavior to very specific tasks and roles, leading to more relevant and efficient assistance. This adaptability makes it a versatile tool for a wide range of development needs.
The Model Context Protocol (MCP) further enhances productivity by enabling seamless integration with a wide array of external tools and services. This allows developers to incorporate Roo-Code into their existing workflows and leverage specialized tools without having to switch contexts or perform manual integrations.
Final words
In the end, we hope that the various information we gave you with this tutoral will be useful to improve the way you’ll use AI in the future.
If you had some problems following the steps of this tutorial, or you want us to write about a specific topic, let us know with a comment on this post, or reach to us by sending us an email or joining our discord community.