Creating captivating images using AI, particularly with the FLUX image generation models, involves crafting detailed and precise prompts. This can be a daunting task, as the intricacies of prompt composition can significantly affect the final output. Let explore how to empower your skills in FLUX prompting to create stunning visuals effortlessly.
Define the Central Theme
Begin by specifying the main subject of your image. This is where you can be as detailed and specific as possible about what you want to emphasize. It’s important to be precise about the style of the image without using literal styles like cubism, futurism, or impressionism, as FLUX is not trained on this data. Instead, use more specific instructions like “anime style cartoon” or “inspired by Miyazaki style” to convey the artistic direction you envision. Consider what you want the focal point to be and describe it thoroughly to ensure clarity and purpose in the output.
Build Your Scene in Layers
To create a rich and dynamic image, consider the various layers within your scene:
- Foreground Elements: Describe the objects or details you want to appear at the forefront. These elements will be the closest to the viewer’s perspective.
- Middle Ground Details: Identify what should occupy the space between the foreground and background. This adds depth and context to your image.
- Background Features: Envision what lies in the backdrop. It could be a landscape, cityscape, or abstract patterns that set the tone and environment of your scene.
Paint with Colors and Style
Next, define the color palette and aesthetic. Mention any specific hues, gradients, or contrasts you wish to incorporate. This step is crucial for setting the emotional tone and visual style of your creation. Consider how colors can convey emotion, mood, and atmosphere in your image.
When constructing your prompt, think about how certain colors interact with each other and the overall feeling they evoke. Be descriptive and precise in your choices to guide the AI effectively. Here are some examples:
- Pastel pinks, purples, and golden hues with gentle gradients, conveying a peaceful and serene morning atmosphere.
- Vibrant electric blues and hot pinks with high contrast, capturing an energetic, futuristic urban environment.
- Deep emerald greens with soft lavender and silver accents, creating a mystical and captivating ambiance.
- Earthy terracotta and rich mahogany tones with warm, inviting sunlight, creating a comfortable and tranquil setting.
Integrate Transparency and Text
If your image requires elements like glass, water, or other transparent materials, describe them here. Additionally, if text plays a role in your composition, specify details about its font, size, color, and positioning. This ensures that textual elements complement the overall design seamlessly.
Transparent materials can add depth and realism to your images, while thoughtfully integrated text can enhance the narrative or provide context. Here is an example to guide you in crafting prompts that effectively incorporate these elements:
- Prompt: “Illustrate an art gallery featuring a large, intricate glass sculpture. The sculpture is made of crystal-clear glass with delicate etchings, casting colorful reflections on the polished marble floor. Include an informative plaque next to the sculpture, with the text in elegant serif font, subtle gold color.”
- Integration Details: The glass sculpture should have transparent qualities with colorful reflections, and the plaque should have text in an elegant serif font, set in a subtle gold color to match the refined gallery setting.
Adjust the Depth of Field
Decide on the depth of field to control the focus level in your image. While FLUX may not be as precise with aperture and depth settings as other models—such as those that can interpret specific photographic metadata like f/1.4—you can still guide it effectively by describing the desired focus depth in more general terms.
FLUX tends to utilize focus and depth extensively, so controlling these aspects through your prompt is crucial for achieving better results. Here’s how you can guide FLUX using generic descriptions of depth of field:
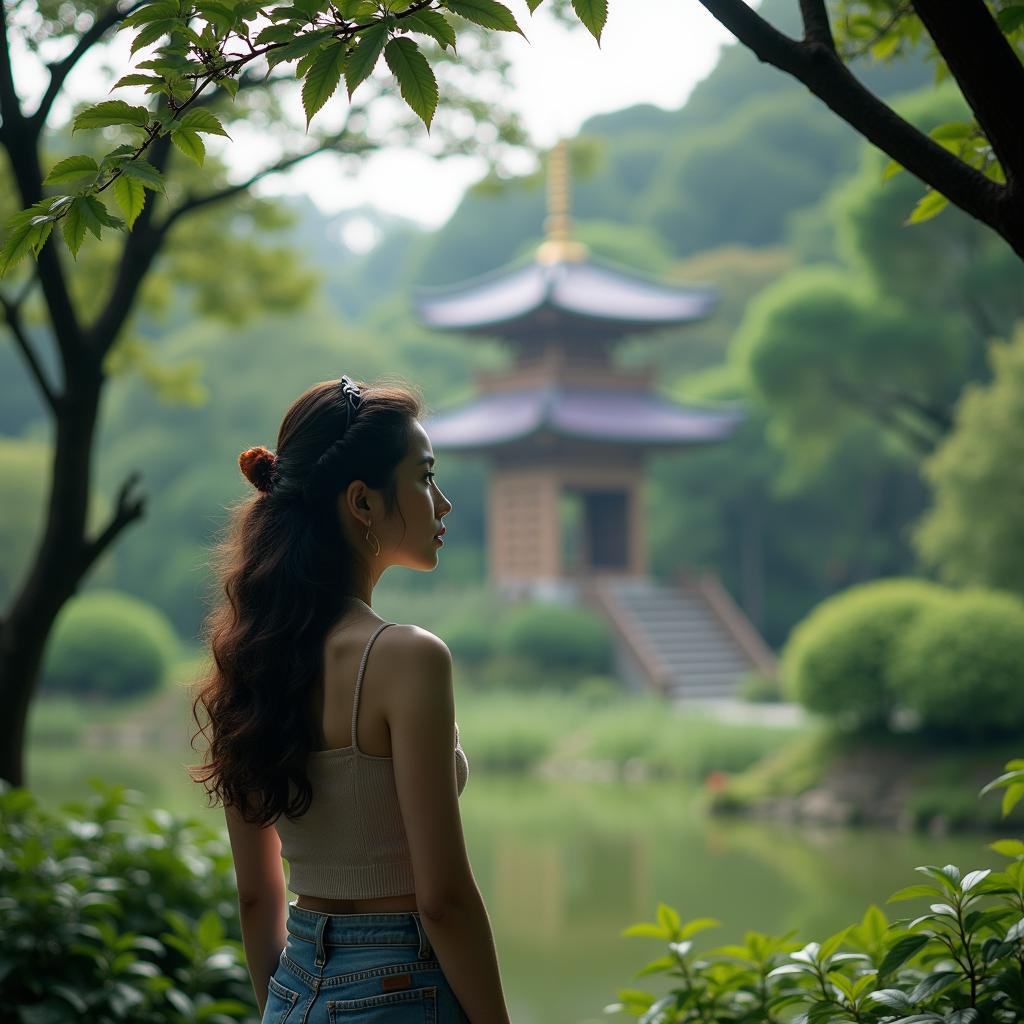
- Requesting a focused foreground (her face) with a blurred background helps achieve a portrait-style depth, akin to using a wide aperture in traditional photography.
- Describing a scene where all elements are in focus suggests a balanced depth of field, similar to using a moderate aperture.
- Focusing sharply on the flower while blurring the background mimics the effect of macro photography, directing attention to the flower’s details.
Let’s Build a UI for Effortless FLUX Prompting
To assist users in crafting detailed and effective prompts for the FLUX image generation model, I have developed a user interface (UI) that simplifies the task by breaking down the prompt creation process into clear, manageable components. The goal of this UI is to guide users through each aspect of prompt composition, ensuring that every detail—such as the central theme, scene layers, color palette, transparency, text integration, and depth of field—is carefully considered and articulated. By structuring prompts in this manner, users can effectively communicate their creative vision to the FLUX model, resulting in more accurate and visually pleasing outputs.
Install Required Packages
Use pip to install the necessary packages.
pip install streamlit requests pillowCode language: Bash (bash)Write and Save the UI Code
flux_ui.py
import streamlit as st
import requests
import base64
from io import BytesIO
from PIL import Image
API_URL = "https://api.regolo.ai/v1/images/generations"
API_KEY = "YOUR-API-KEY"
st.set_page_config(page_title="FLUX Prompt Builder")
st.title("🖼️ FLUX Prompt Builder")
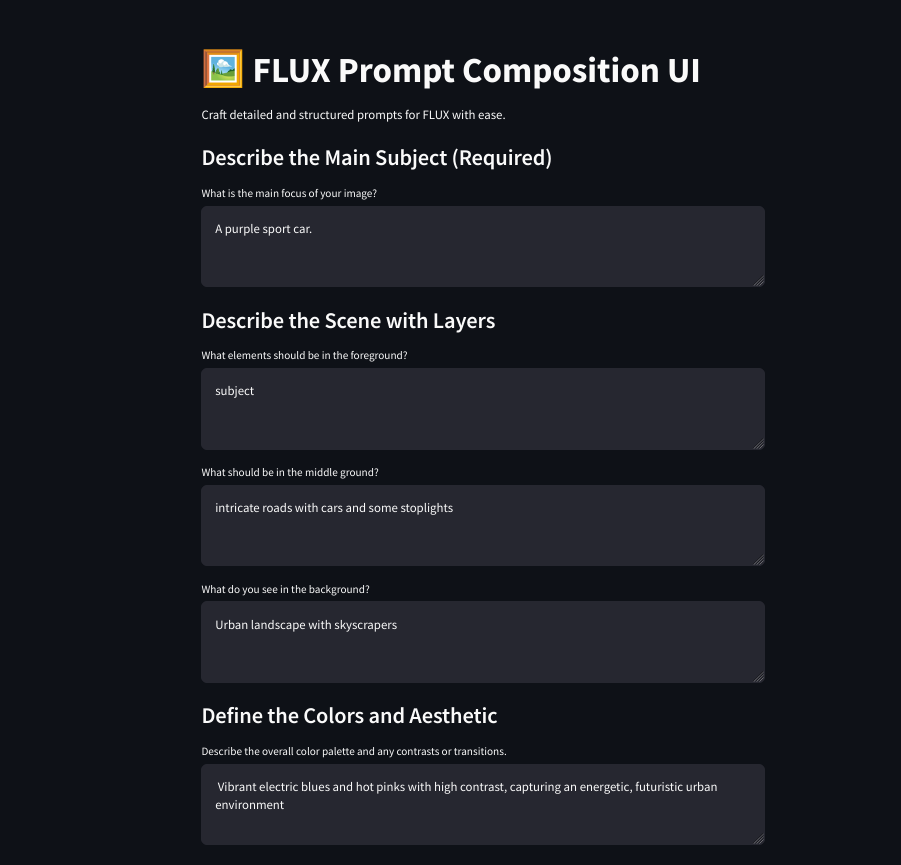
st.write("Craft detailed and structured prompts for FLUX with ease.")
# User inputs for prompt generation
st.subheader("Describe the Main Subject (Required)")
main_subject = st.text_area("What is the main focus of your image?")
st.subheader("Describe the Scene with Layers")
foreground = st.text_area("What elements should be in the foreground?")
middle_ground = st.text_area("What should be in the middle ground?")
background = st.text_area("What do you see in the background?")
st.subheader("Define the Colors and Aesthetic")
colors = st.text_area("Describe the overall color palette and any contrasts or transitions.")
st.subheader("Add See-through Elements or Text")
transparency = st.text_area("Are there any glass, reflections, or transparent materials?")
text_integration = st.text_area("Would you like to include any text? Describe its font, size, color, and placement.")
st.subheader("Control Depth of Field")
aperture_options = ["Wide aperture with blurred background", "Moderate aperture with balanced focus", "Narrow aperture with full focus"]
blur_focus = st.selectbox("Choose the depth of field:", ["None"] + aperture_options)
col1, col2 = st.columns([0.5,0.5])
with col1:
st.subheader("Number of Images")
num_images = st.number_input("Select the number of images:", min_value=1, max_value=4, value=1)
with col2:
st.subheader("Images Size")
size_options = ["256x256", "512x512", "1024x1024"]
size = st.selectbox("Size:", size_options)
# Button to generate the prompt
if st.button("Generate Prompt"):
# Check if the main subject is empty
if not main_subject.strip(): # Check if main_subject is empty or only whitespace
st.error("The main subject field is required.")
else:
generated_prompt = f"{main_subject}\n"
if foreground:
generated_prompt += f"In the foreground, {foreground}.\n"
if middle_ground:
generated_prompt += f"In the middle ground, {middle_ground}.\n"
if background:
generated_prompt += f"In the background, {background}.\n"
if colors:
generated_prompt += f"The scene features {colors}.\n"
if transparency:
generated_prompt += f"There are elements of transparency, such as {transparency}.\n"
if text_integration:
generated_prompt += f"Include Text {text_integration}.\n"
if blur_focus != "None":
generated_prompt += f"The image is captured with {blur_focus}.\n"
# Store generated prompt in session state
st.session_state.generated_prompt = generated_prompt
# Text area to edit the generated prompt
st.subheader("Your Generated Prompt")
if 'generated_prompt' in st.session_state:
prompt_input = st.text_area("Edit your prompt:", value=st.session_state.generated_prompt, height=240)
# Button to generate images using the edited prompt
if st.button("Generate Images"):
payload = {
"prompt": prompt_input,
"n": num_images,
"model": "FLUX.1-dev",
"size": size
}
headers = {"Authorization": f"Bearer {API_KEY}", "Content-Type": "application/json"}
# Use a spinner while generating images
with st.spinner("Generating images..."):
response = requests.post(API_URL, json=payload, headers=headers)
if response.status_code == 200:
# Load the images into session state
if 'generated_images' not in st.session_state:
st.session_state.generated_images = []
images = response.json().get("data", [])
for img_data in images:
img_b64 = img_data.get("b64_json")
if img_b64:
img_bytes = base64.b64decode(img_b64)
img = Image.open(BytesIO(img_bytes))
st.session_state.generated_images.append(img) # Store image in session state
st.success(f"{len(images)} images generated!")
else:
st.error("Failed to generate images. Please try again.")
else:
st.warning("Generate a prompt first.")
# Display generated images from session state
if 'generated_images' in st.session_state:
st.subheader("Generated Images")
for idx, img in enumerate(st.session_state.generated_images):
st.image(img, use_container_width=True)
img_buffer = BytesIO()
img.save(img_buffer, format="PNG")
st.download_button("Download Image", img_buffer.getvalue(), file_name=f"generated_image_{idx + 1}.png", mime="image/png")
st.divider()
# Button to clear images and reset the generated prompt
if st.button("Clear Images and Reset the Prompt"):
st.session_state.clear()
st.rerun()
Code language: Python (python)Run the Streamlit Application
Launch the Streamlit app by executing the following command in your terminal or command prompt from the directory where your flux_ui.py file is located:
streamlit run flux_ui.pyCode language: Bash (bash)Once the command runs, Streamlit will start a local server and provide a URL,
typically http://localhost:8501
Open this URL in your web browser to access and enjoy the FLUX Prompt Composition UI.
Conclusion
By following this structured approach, you can transform your imaginative concepts into tangible art with ease. My FLUX Prompt Composition UI streamlines the creative process, making it accessible to both novices and professionals. Try it today using the Regolo.ai APIs and unlock the potential of AI-powered image generation to bring your ideas to life.