# From Prompting to Loop Engineering: Building Autonomous Agents in VS Code
Stop acting as the feedback mechanism for your AI. Instead of traditional prompting (You → Prompt → Agent → Output → You Fix), design a **Closed Loop** (Discover → Plan → Execute → Verify → Iterate). By defining strict custom agent modes in Zoo Code's `.roomodes` and setting clear stop conditions via automated tests, you can orchestrate a 4-stage pipeline (Planner, Coder, Tester, Reviewer) that fixes its own bugs.
## Table of Contents
- [Prompt Engineering is Dead. Enter Loop Engineering.](#prompt-vs-loop)
- [The 5 Phases of an Autonomous Loop](#five-phases)
- [Step 1: Configure Zoo Code with Regolo](#step-1)
- [Step 2: Define the Fleet Loop in .roomodes](#step-2)
- [Step 3: Execution and Stop Conditions](#step-3)
- [Final FAQs](#faqs)
## Prompt Engineering is Dead. Enter Loop Engineering
We see this failure pattern constantly: developers ask a single LLM to build a feature, write the tests, and check for security flaws all in one prompt. While that approach might survive a basic 50-line script, it completely collapses when dealing with the complexity of a production application.
In traditional prompting, you are the loop, the agent generates code, it breaks, and you manually paste the error back. **A single agent quickly saturates its context window**, often forgetting the initial architecture decisions by the time it writes the unit tests, and this creates a debugging nightmare where you spend more time fixing the AI than writing code.
### As Peter Steinberger (OpenClaw) and Boris (Claude Code) recently highlighted, the shift is moving from prompting to **System Design**: a Loop Engineer doesn't write better instructions; they design systems that autonomously produce verified results.
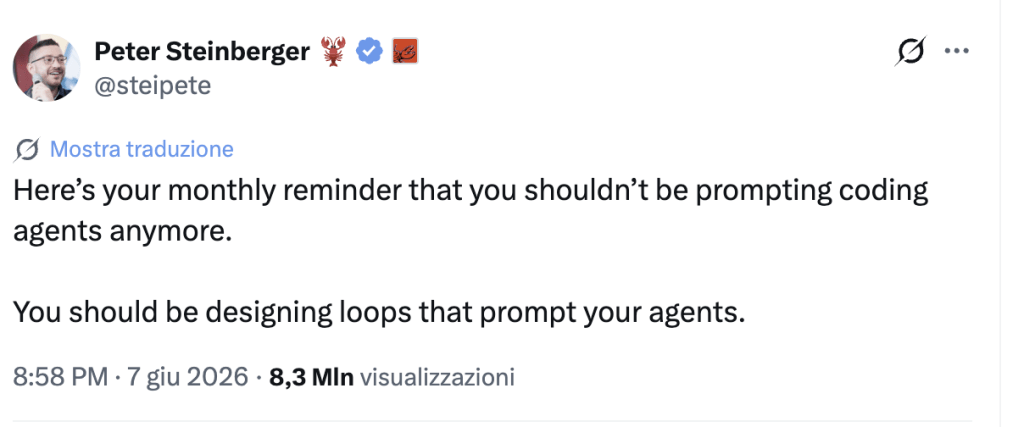*Link to tweet: *
Some open source tool that today create a good loop engineer:
- CrewAI: here a [tutorial for building multi-agent workflow](https://regolo.ai/build-multi-agent-workflows-with-crewai-teams/)
- Hermes: here a [youtube tutorial](https://www.youtube.com/watch?v=iG1IEVk_gUU) to setup with our APIs.
---
## The 5 Phases of an Autonomous Loop
A repeatable loop removes the human from the micro-iterations, whether it's a single self-correcting agent or a "Fleet Loop" (Orchestrator + Sub-agents), it follows five strict phases:
1. **Discover:** explore the codebase to understand what is needed.
2. **Plan:** outline the specific architectural steps.
3. **Execute:** write the code using constrained tools.
4. **Verify:** run linters, compilers, and automated tests.
5. **Iterate:** if verification fails, feed the structural error back to the Execute phase.
To prevent infinite, expensive "Open Loops" that generate slop, we build **Closed Loops**, these require a precise goal, strict context boundaries (like a `VISION.md` file), and hard stop conditions (e.g., "stop when tests pass or after 3 failed attempts").
## Step 1: configure Zoo Code with Regolo
To build this directly in Extension button in the sidebar menu on the left side of VS Code, search and install the **[Zoo Code](https://marketplace.visualstudio.com/items?itemName=ZooCodeOrganization.zoo-code)** extension: since it supports custom OpenAI-compatible endpoints right out of the box, it integrates perfectly our APIs.
1. Open the Zoo Code settings panel
2. Set the API Provider to **OpenAI Compatible**
3. Set Base URL to `https://api.regolo.ai/v1`
4. Enter your [Regolo API Key](/signup)
5. Choose the Model ID you can copy into Playground or in the model list, input one or more of [Regolo's Core Models](/models) such as `Qwen/Qwen2.5-Coder-32B-Instruct` or `meta-llama/Meta-Llama-3.1-70B-Instruct`.
Continuous execution loops consume massive amounts of tokens, to avoid burn your budget in a overnight we added into spec the max loop admitted.
## Step 2: define the Fleet Loop in .roomodes
Roo Code allows you to define custom modes by creating a `.roomodes` file in your workspace root using YAML. This is where we define our Fleet Loop: Planner, Coder, Tester, and Reviewer.
Add a new file `.roomodes`in the root folder of your project:
```
customModes:
- slug: planner
name: 🗺️ Planner
roleDefinition: |-
You are the Discover & Plan node. Never write code.
Explore the workspace, read VISION.md, and turn vague requests into crystal-clear specs.
Output your plan to pipeline/spec.md.
whenToUse: Use this mode when designing a new feature before writing code. It transforms vague requests into strict architectural specs with clear acceptance criteria and implementation steps.
description: Turns requests into strict architectural specs.
groups:
- read
source: project
- slug: coder
name: 💻 Coder
roleDefinition: |-
You are the Execute node.
Read pipeline/spec.md and implement exactly what it says.
Do not plan. Write clean code and create pipeline/changes.md summarizing modifications.
whenToUse: Use this mode to write implementation code based on a spec. It reads pipeline/spec.md and produces production-ready code along with a changes summary.
description: Writes production-ready code from specifications.
groups:
- read
- edit
- command
source: project
- slug: tester
name: 🧪 Tester
roleDefinition: |-
You are the Verify node.
Read pipeline/spec.md and pipeline/changes.md.
Write comprehensive tests, execute them via terminal commands, and output results in pipeline/test-results.md.
If tests fail, output structural feedback for the Coder.
whenToUse: Use this mode to verify the execution loop via automated tests. It reads the spec and changes, runs tests, and produces a structured test-results report.
description: Ensures implemented code meets the spec via automated verification.
groups:
- read
- edit
- command
source: project
- slug: reviewer
name: 🔍 Reviewer
roleDefinition: |-
You are the Stop Condition gatekeeper (read-only).
Review pipeline/spec.md, pipeline/changes.md, pipeline/test-results.md, and all code changes.
Give a clear verdict: APPROVED (Stop) or REJECTED (Iterate). Do not edit code.
whenToUse: Use this mode to audit the final code and test outputs. It reviews all pipeline artifacts and issues a final stop/iterate verdict without modifying any files.
description: Audits the pipeline and issues a final stop/iterate verdict.
groups:
- read
source: project
- slug: orchestrator
name: 🔄 Orchestrator
roleDefinition: |-
You are the Closed Loop Orchestrator. You coordinate the full 5-phase autonomous pipeline:
PHASE 1 — DISCOVER: Delegate to Planner to explore the codebase and read VISION.md.
PHASE 2 — PLAN: Delegate to Planner to produce pipeline/spec.md with strict acceptance criteria.
PHASE 3 — EXECUTE: Delegate to Coder to implement pipeline/spec.md and write pipeline/changes.md.
PHASE 4 — VERIFY: Delegate to Tester to run linters, compilers, and automated tests, writing results to pipeline/test-results.md.
PHASE 5 — ITERATE: If Tester reports failures, feed the structured error back to Coder (return to Phase 3). If Reviewer issues APPROVED, stop the loop.
STOP CONDITIONS (hard limits — never exceed):
- Loop stops immediately when Reviewer issues APPROVED.
- Loop stops after 3 consecutive failed Execute→Verify cycles and reports failure to the user.
- Never proceed without a valid pipeline/spec.md (Closed Loop requires strict context boundaries).
You do not write code, edit files, or run tests directly. You only delegate and track loop state.
Write loop status to pipeline/loop-status.md after each phase (current phase, iteration count, verdict).
whenToUse: Use this mode to run the full autonomous Discover→Plan→Execute→Verify→Iterate loop. It coordinates Planner, Coder, Tester, and Reviewer as sub-agents in a closed loop with hard stop conditions (APPROVED or max 3 iterations). Ideal for autonomous feature implementation with no human micro-intervention.
description: Runs the full 5-phase autonomous closed loop with hard stop conditions.
groups:
- read
- - edit
- fileRegex: pipeline/loop-status\.md$
description: Loop status tracking file only
source: projectCode language: JavaScript (javascript)
```
This configuration strictly restricts what each agent can do because the Planner and Reviewer are configured as read-only, they are prevented from accidentally breaking the codebase while thinking through complex architectural problems.
## Step 3: execution and Stop Conditions
With the `.roomodes` file saved, you trigger the loop directly in the Roo Code interface.
1. **Discover & Plan:** ask the Planner to design your feature. It generates `.pipeline/spec.md`.
2. **Execute:** switch to the Coder. Tell it "Implement the spec", prompting it to write the code and update `.pipeline/changes.md`.
3. **Verify:** switch to the Tester. Tell it "Write and run tests". If tests fail, feed the terminal output back to the Coder to close the loop.
4. **Stop Condition:** once tests pass, ask the Reviewer for the final verdict.
By shifting from manual prompting to a verified feedback loop, the context remains pristine at every step, **hallucinations drop to near zero, and the quality of the generated code increases dramatically.**
---
## FAQs
### What happens if the loop gets stuck failing tests?
This is why closed loops require hard constraints. If the Coder and Tester fail to resolve an issue after 3 iterations, the loop aborts and alerts a human. This prevents the agent from burning tokens on an architectural dead end.
### Why are open-weight models better for loop engineering?
Because loops are highly iterative, token consumption scales linearly with the complexity of the feature. Using Regolo.ai’s Core Models provides predictable usage pricing for top-tier open models like Qwen 2.5 Coder, making persistent agentic loops financially viable.
### Is zero data retention enough for GDPR compliance?
While it is a critical baseline, true compliance also requires EU data residency and explicit DPA agreements, which ensure no data transfers occur outside the European Economic Area during the inference loops.
---
Sta**rt your free 30-day trial at [regolo.ai](https://regolo.ai/) and deploy LLMs with complete privacy by design.**
👉 [Talk with our Engineers](https://regolo.ai/contacts/) or [Start your 30 days free →](https://regolo.ai/pricing)
---
- [Discord](https://discord.gg/ZzZvuR2y) - Share your thoughts
- [GitHub Repo](https://github.com/regolo-ai/) - Code of blog articles ready to start
- Follow Us on X [@regolo\_ai](https://x.com/regolo_ai)
- Open discussion on our [Subreddit Community](https://www.reddit.com/r/regolo_ai/)
- Full list of model available: [Models](/models)
---
*Built with ❤️ by the Regolo team. Questions? [regolo.ai/contact](https://regolo.ai/contact)* or chat with us on [Discord](https://discord.gg/ZzZvuR2y)